Introduction
Tag jumping is immensely helpful when developing in a CLI environment such as Vim or Emacs. Simply place a marker over the function, variable, class, macro, etc. and with a keystroke, jump to the declaration or view other references across multiple files. This productivity tool will help you develop and debug faster and get a better understanding of your codebase.
There are two main solutions for tag jumping: ctags and cscope. Both are very similar in how they function: scan a codebase and index keywords (tags) and their locations. Vim understands the index and provides you with an interface for jumping back and forth between the tags.
The differences between the two are small, but important to distinguish. With ctags, you can use autocomplete (aka omnicomplete) for function and variable names as you type, something cscope doesn’t give you. Also, there’s much less setup to get ctags up and running as it’s generally already installed. The downside is ctags doesn’t do as well as cscope with a conglomerated or mostly unknown codebase. The good news is, they can co-exist! Home
We’re going to take a look at setting up and basic usage of both in this guide. If you need a diverse codebase to try this out on, try cloning a random trending c repository from GitHub. I settled on grpc/grpc because it was large and varied enough to really put ctags and cscope to the test.
Setting up ctags
The good news here is that most systems come with ctags pre installed. Depending on your Linux distribution, you may or may not have the exuberant-ctags package which is needed to enable you to recursively scan your codebase. You can double check by executing ctags –version. You should see output similar to this if you have it installed:
Exuberant Ctags 5.9~svn20110310, Copyright (C) 1996-2009 Darren Hiebert
Compiled: Oct 3 2014, 13:24:45
Addresses: <dhiebert@users.sourceforge.net>, http://ctags.sourceforge.net
Optional compiled features: +wildcards, +regex
If not, it’s a pretty simple apt-get install exuberant-ctags (or the like) command. If you had ctags installed and not exuberant-ctags, you’ll also need to run this command: update-alternatives –config ctags
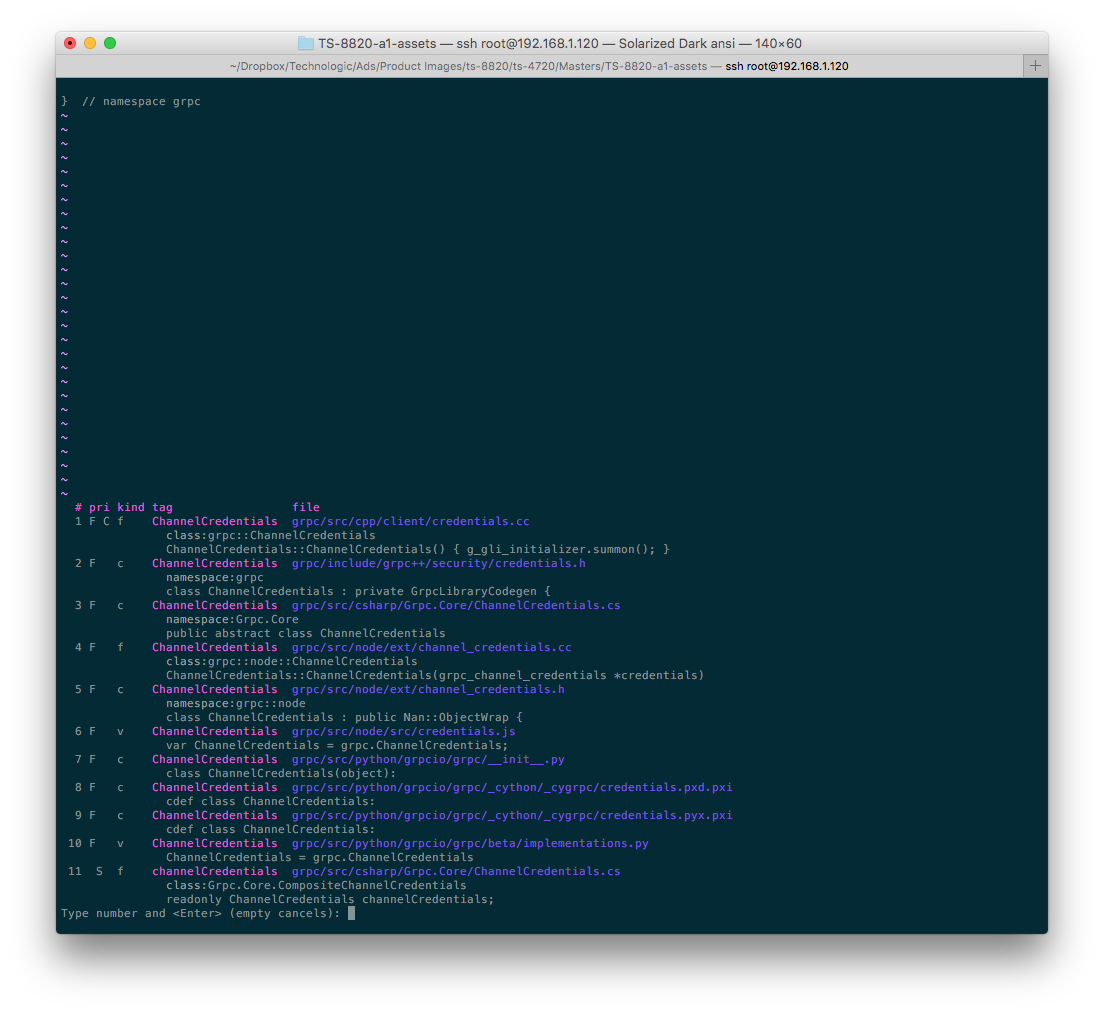
Great, now that it’s installed, we can begin using it (once the index is built). This can be done from the shell from within your project’s root directory or from within Vim. From the shell, it’s simply ctags -R .From within Vim, type :!ctags -R .. Once the index is built, open Vim, find a function call or variable name, hover over it, and hit Ctrl+]. You should get output similar to the screenshot below. Simply select the number you wish to explore more about and it’ll take you there. Hit Ctrl+t to jump back.
You can also give the autocomplete a try by starting to type the name of a function or variable. Then, while still in insert mode, hit Ctrl+x Ctrl+]. You should get a list like shown in the screenshot below.
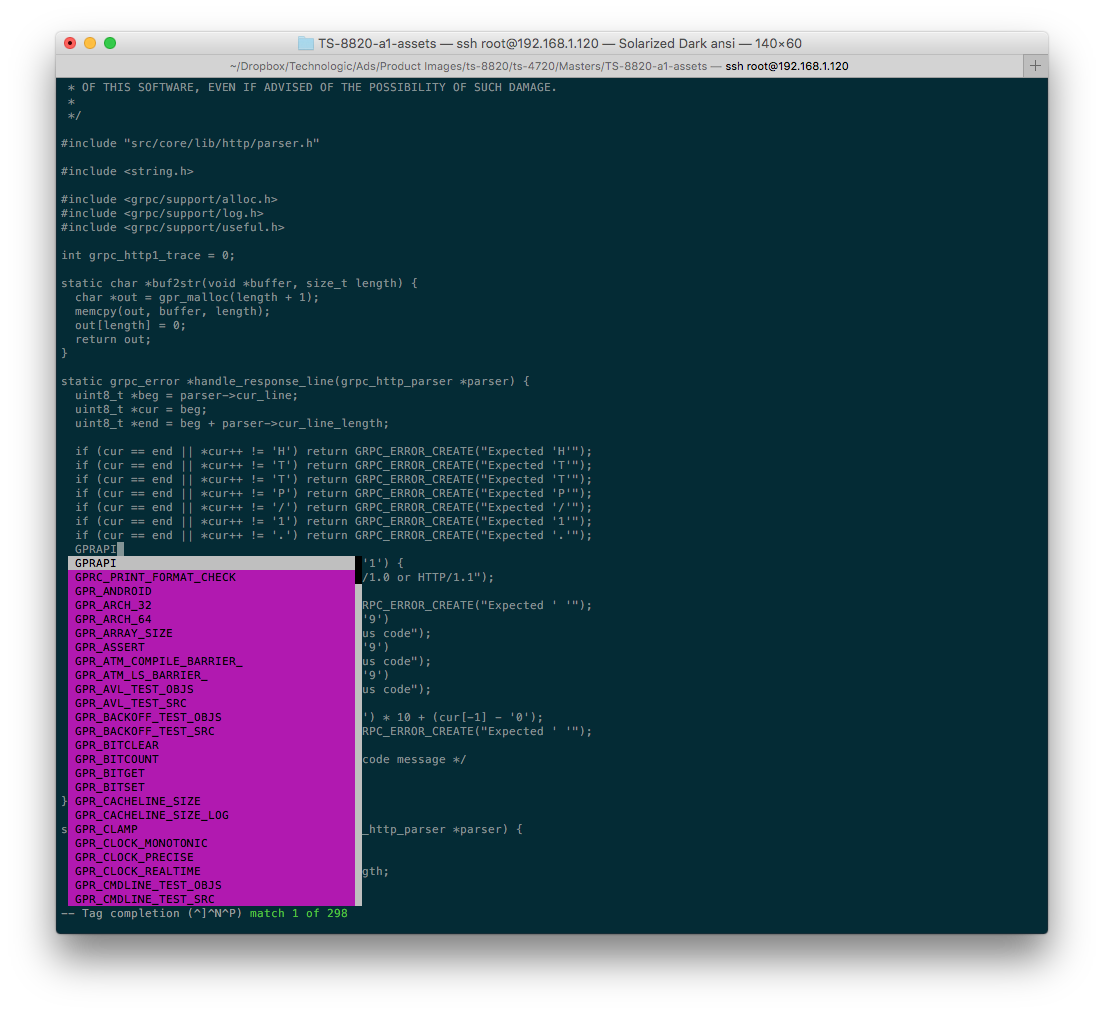
Pro Tip: You could setup autocomplete with a shorter alias (inoremap <c-x><c-]> <c-]>), and you could try the Acp plugin for automatically showing this menu as you type.
There’s still a lot you can learn about ctags, including the various keystrokes and shortcuts for getting around even better. We’ll leave that as a learning opportunity for the reader. Home
Setting up cscope
Installing cscope is very easy and takes up about 542 KB of additional disk space. A simple apt-get install cscope (or similar command) will do just fine here. To test your installation, just run cscope –version and you should get a version number back. There are some additional steps we need to take, but keep with it and it’ll be worth it in the end. First, we’ll create a custom script called ‘gentags’ that we can run from any project folder. Second, we’ll download and install a Vim plugin which will give us nice keybindings or key maps. Third, we’ll make sure our .vimrc file is setup properly. Finally, we can begin using cscope.
Create Custom Script for Quick Indexing
We’re creating a script to make our lives easier in setting up a cscope index or database. We’ll place this script somewhere in our $PATH variable, which /usr/local/bin/ is usually the preferred spot and name it gentags. Here’s our /usr/local/bin/gentags file contents:
#!/bin/bash

CSCOPE_DIR="$PWD/cscope"

if [ ! -d "$CSCOPE_DIR" ]; then
mkdir "$CSCOPE_DIR"
fi

echo "Finding files ..."
find "$PWD" -name '*.[ch]' \
-o -name '*.java' \
-o -name '*properties' \
-o -name '*.cpp' \
-o -name '*.cc' \
-o -name '*.hpp' \
-o -name '*.py' \
-o -name '*.php' > "$CSCOPE_DIR/cscope.files"

echo "Adding files to cscope db: $PWD/cscope.db ..."
cscope -b -i "$CSCOPE_DIR/cscope.files"

export CSCOPE_DB="$PWD/cscope.out"
echo "Exported CSCOPE_DB to: '$CSCOPE_DB'"
It’s not a terribly complicated script. We’re simply creating a directory in which to store a list of filenames we wish to index, then we add those files to the cscope database/index, and set our $CSCOPE_DB environment variable, which is looked at by Vim. Be aware that $CSCOPE_DB is set for the current session only. If you logout or switch to a different shell, you’ll need to re-declare/re-export the variable.
Once you’ve created this script, be sure to mark it as executable using chmod +x /usr/local/bin/gentags. Running the script will generate a directory and afile: cscope and cscope.db. If you’re working in a code repository, you may want to add them to your ignore list (ie. .gitignore).
Download and Install Vim Cscope Plugin
We’ll be downloading and installing the cscope maps plugin for Vim. You can find out more about it on the cscope sourceforge page. Before we install, we’ll need to create a plugin directory and download it. Here are the commands we’re going to use:
mkdir ~/.vim/plugins
cd ~/.vim/plugins
wget http://cscope.sourceforge.net/cscope_maps.vim
The next step is to install the plugin by editing our ~/.vimrc file. This file is sourced every time we load Vim. Add the following line to ~/.vimrc (doesn’t matter, top or bottom of file):
source ~/.vim/plugins/cscope_maps.vim
Pro Tip: Some might suggest to add the following line as well, although this author didn’t find that necessary with the script above.set tags+=./TAGS;$HOME/src/ # $HOME/src is the highest directory level to look for TAGS file.
At this point, you should be able to run vim and not get any warnings or errors. If that’s the case, congrats! You’re ready to start using it.
The main keystrokes here are similar to ctags: Ctrl+] for jumping to definitions; Ctrl+\ s (or Ctrl+Spacebar s) for finding references. You can find out much more online. Here’s a couple links to get you started.
- http://cscope.sourceforge.net/cscope_vim_tutorial.html
- http://www.yolinux.com/TUTORIALS/LinuxTutorialAdvanced_vi.html
Conclusion
This guide discussed the benefits of using programs like ctags and cscope together in order to maximize productivity while developing in large or small codebases alike. It showed you how to get started using both and some tricks along the way. Hopefully you’re feeling inspired to start using these new tools and anxious to start searching for your own tips and tricks. Feel free to comment below with your findings. Happy coding! Home
Thanks for putting up the details very clearly.
Sure thing!