Introduction
This guide will walk you through the basic steps of getting your TS-7680 up and running. It’s mostly an extrapolation from the official TS-7680 Manual, but provides a more practical and casual approach in setting up common connections, networking, and environments to begin development.
Connections and Jumpers
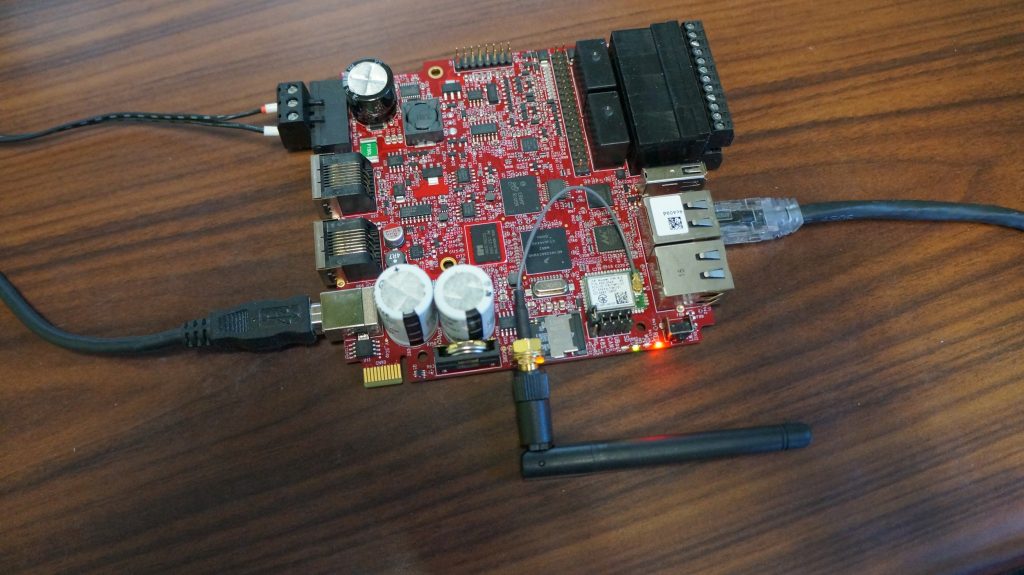
Let’s get our TS-7680 hooked up! This includes our very basic connections we’ll need for most any development or project: power, serial console, Ethernet, and WiFi.
Jumpers
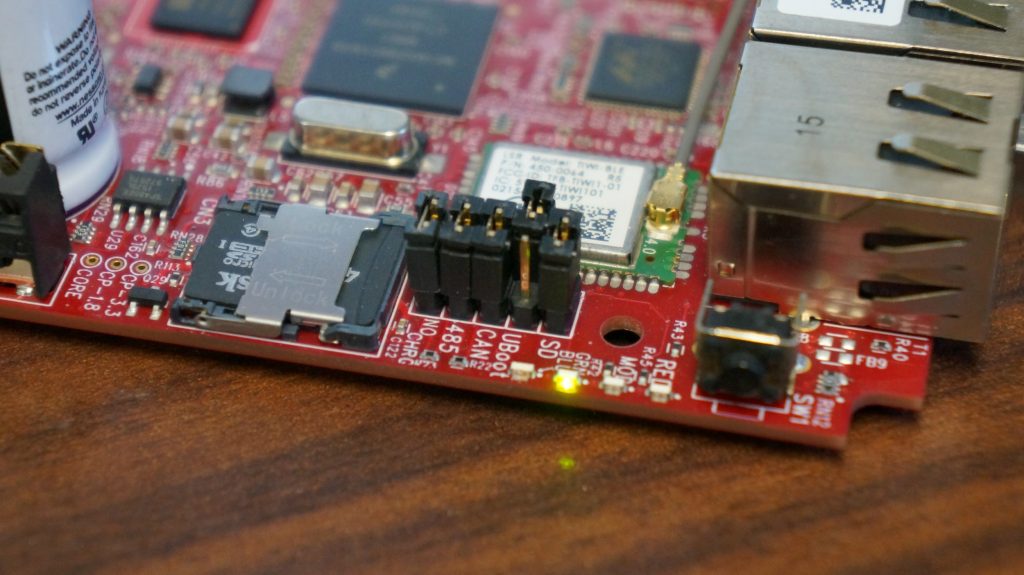
Out of the box, the TS-7680 has three of it’s five jumpers set to 1.) boot from the onboard eMMC flash, 2.) drop you to a U-Boot shell, and 3.) charge the TS-SILO supercaps. Certainly, it depends on your preferences when it comes to setup for development, but we’re going to go with the jumper configuration you see in the image above. That is, we will 1.) boot to the SD card, 2.) skip U-Boot shell and boot straight into the Debian environment, and 3.) not charge the TS-SILO supercaps so we can disconnect power without needing to wait for them to discharge (20 – 60 seconds). Later in this guide, we’ll re-enable TS-SILO supercaps charging so we can test their capabilities.
Serial Console
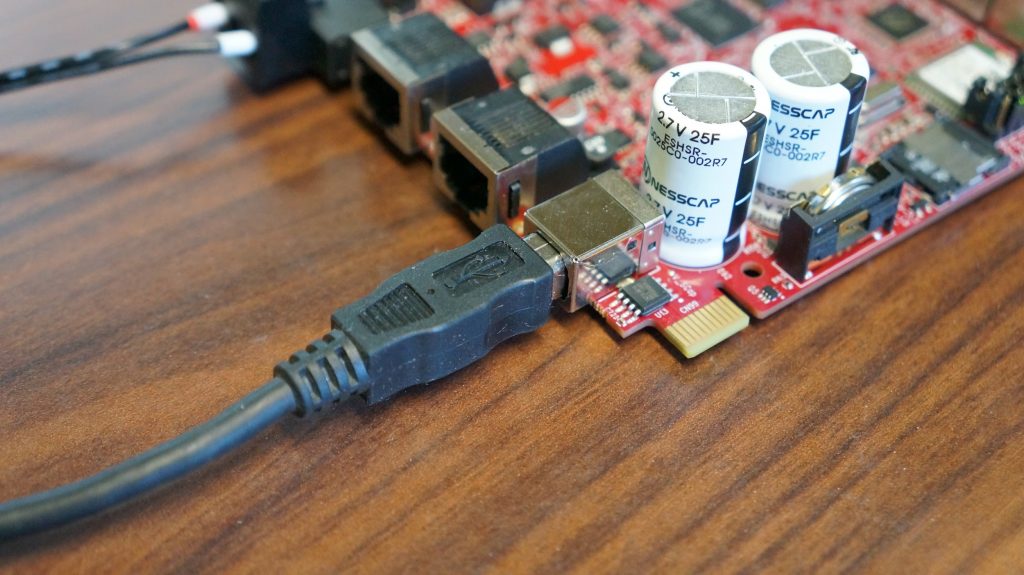
Nothing beats a good ‘ol serial console for direct access to an embedded system. Where others like telnet and SSH might fail due to bad startup scripts or network snafus, a direct serial console connection will always be there to bail you out. For this, you’ll simply need an A/B USB cable. No need to deal with NULL modem cables or USB to serial adapters in this case. Just a clean, single cable solution.
It’s recommended that you work from a Linux development machine. Not only are the serial port drivers already installed, but you’ll also need it if you plan on using our cross compile toolchains for a larger project later on. For now, if you’re on a Windows or Mac OSX machine, you can obtain the serial port drivers from the Silabs USB-to-UART drivers page.
Next step is to connect the USB cable to your computer and follow the instructions given in the “Get a Console” section of the TS-7680 manual. This author’s preference is minicom, a no-frills, cross-platform serial communications program (runs in Cygwin for Windows, otherwise use PuTTY). Basically, we’re setting the baud rate to be 115200 with 8N1 parity, no hardware or software flow control. Typically, your serial device name may be:
- Linux, /dev/ttyUSB0
- Mac OSX, /dev/tty.SLAB_USBtoUART
- Windows, use device manager to discover COM port
After setting some jumpers and applying power, which we’ll talk about both next, you’ll see something similar to the screenshot below (Mac OSX Terminal running minicom):
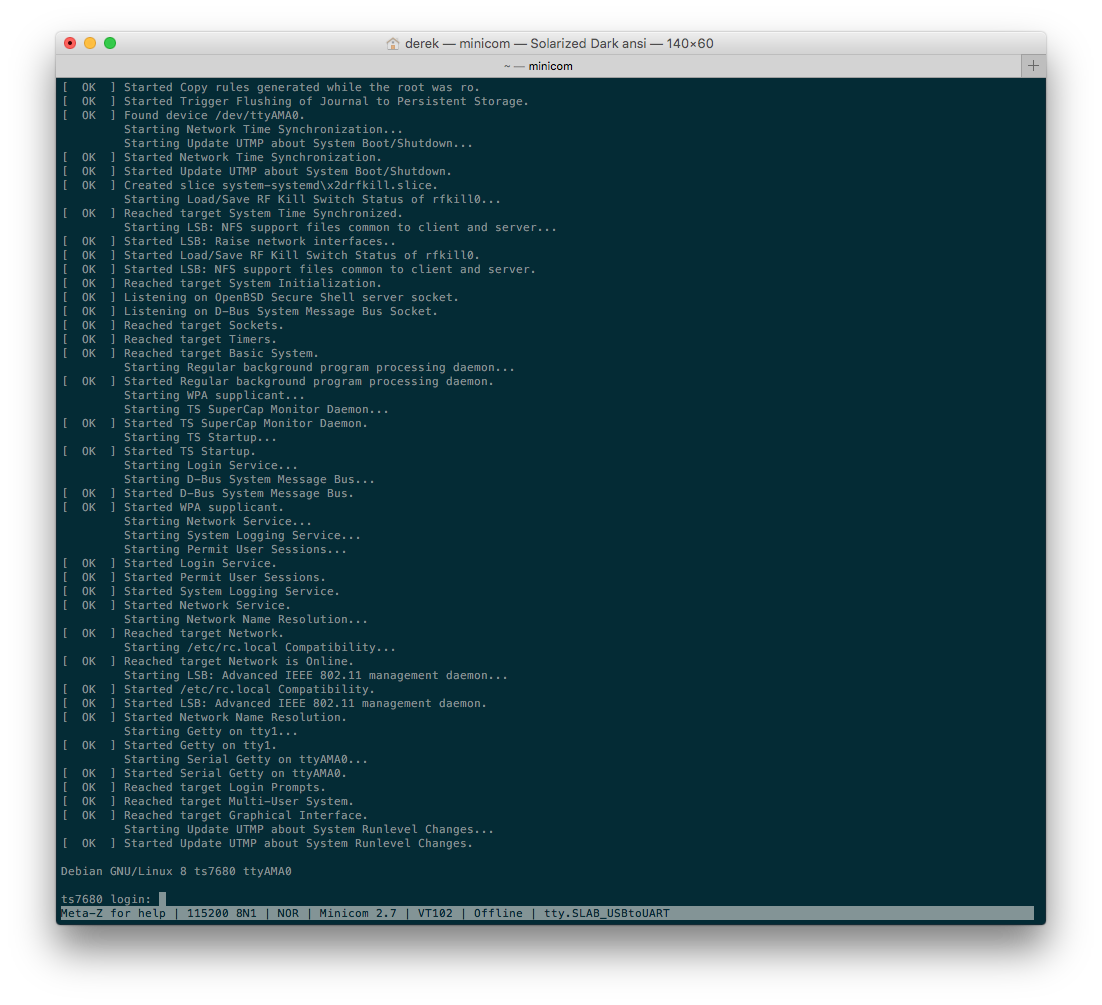
Then, you’ll simply login using the username ‘root’ without any password.
Pro Tip: Running minicom alone will constrain the terminal row and column count to something pretty small that will never take up the whole terminal window. To take advantage of all the real estate your terminal window has to offer, run TERM=linux minicom instead. Remember to setup an alias as a shortcut for yourself!
Console in a Linux Virtual Machine (VirtualBox)

As a quick aside, you can also use a virtual Linux development machine using VMWare or VirtualBox. This author’s choice is VirtualBox for its simplicity, ‘just works’ feel, and readily available optimized virtual machine downloads. To get a serial console working, you’ll need to boot your VM, click on the USB icon, select the Silicon Labs connection from the list, and then start minicom (after pointing it to /dev/ttyUSB0).
Power
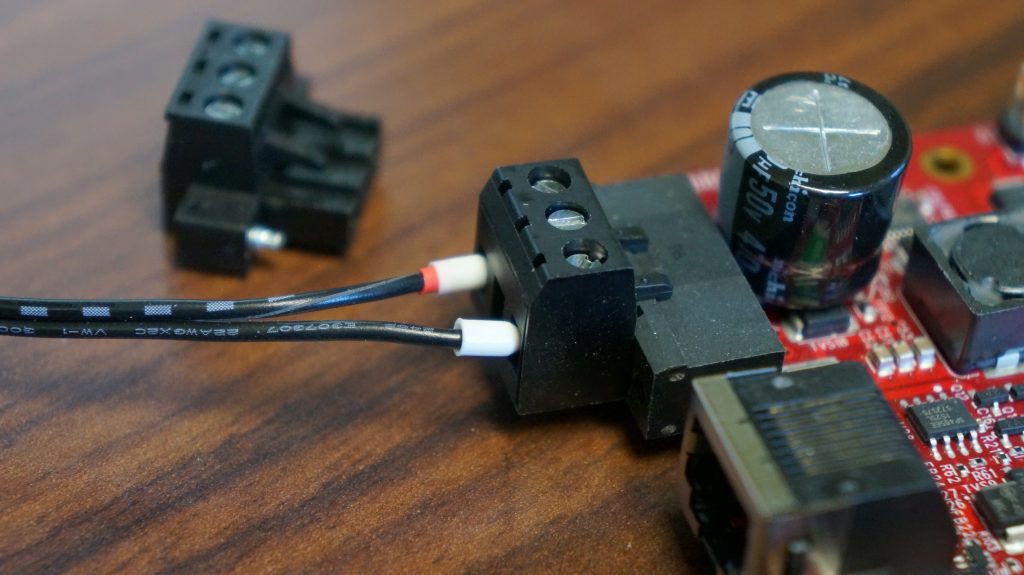
One of the features that sets the TS-7680 apart is its flexible input voltage of both DC and AC current. Mainly, we’ll be using the 12 VDC power supply. The first thing you’ll need to do is remove the extra screw terminal connector that’s already plugged into the main power connector and then plugin our power supply. The TS-7680 takes up about 1.4 W at idle, but could be as high as 5 W depending on peripherals connected.
Pro Tip: If you hadn’t noticed, the extra screw terminal connector we removed has screws on the sides to really secure the power input to the board. It’s recommended you use this connector in production. For development, it’s nice to be able to unplug the unit easily.
The bootup process will begin immediately once you plugin the power supply. If you have a serial console program up and running, you’ll see the boot messages displayed on the console.
Ethernet
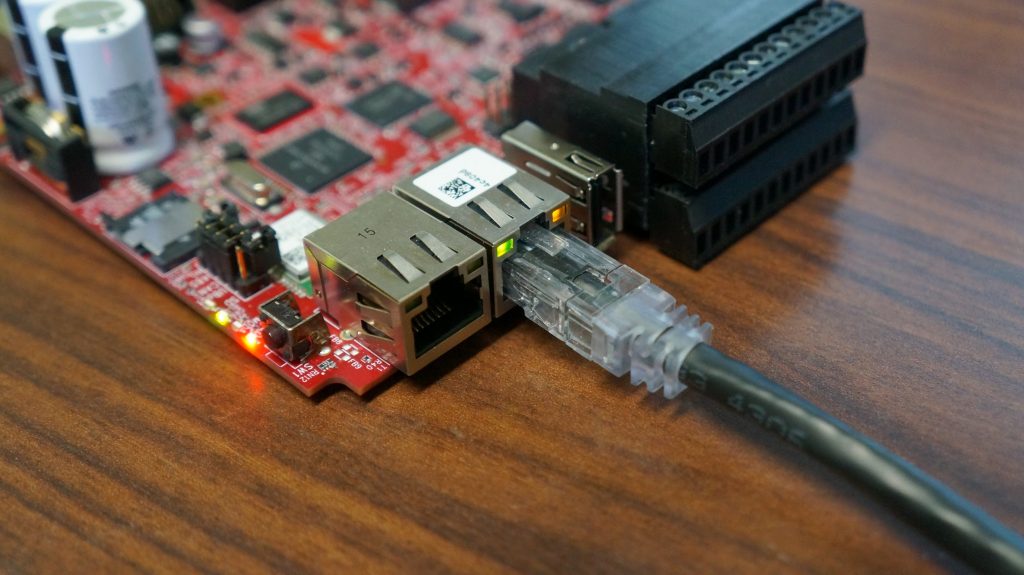
Undoubtedly, you’ll want to connect the TS-7680 to a network for SSH access, or NFS booting, or communicating with other systems, or downloading new programs, or countless other number of reasons. The first thing to note is the TS-7680 comes with two 10/100 Ethernet connections thanks to an on-board switch. You can use either port and each will be designated as eth0 in Linux. If you want to use both at the same time, you’ll need to enable VLAN mode as mentioned in the “VLAN” section of the TS-7680 manual. Then, you’ll want to be careful not to connect both ports to the same network or you’ll run the risk of creating a loop in the network topology. We’ll define our primary port as the one next to the vertical USB connector and screw terminal connectors, designated as eth0.1. The secondary, designated as eth0.2, is be populated to the next to the primary. Plug in a standard Ethernet cable connected to your router or switch, and continue reading for further instructions on setup. Of course, you could go wireless as well, but for development, a good ‘ol solid Ethernet connection eliminates a lot of guesswork and headache.
Wireless Module Antenna
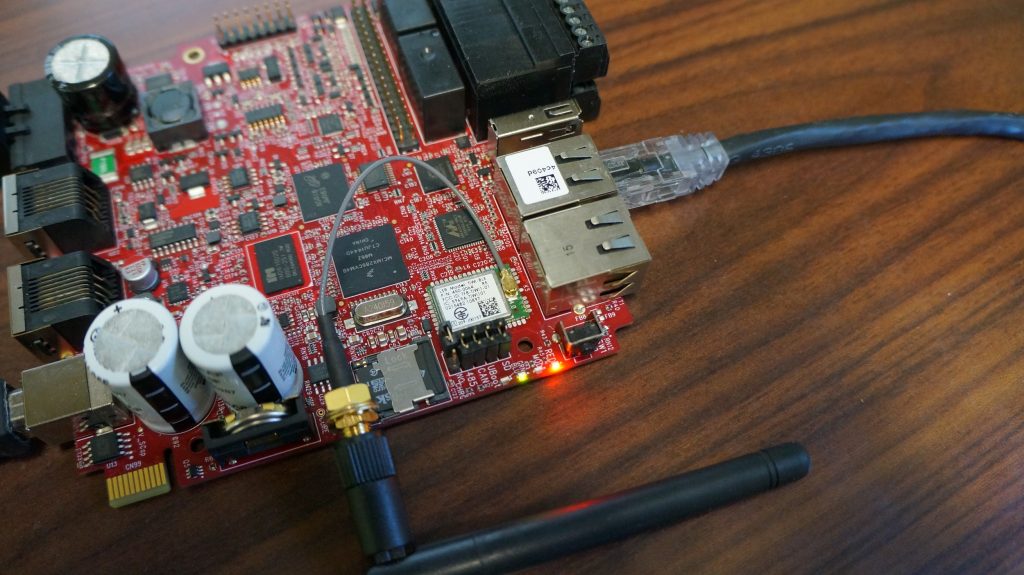
In order for the wireless feature to work, you’ll need to attach an antenna. This is easy as there’s only one obvious spot to plug it into located on the wireless module, but it’s a little tight and hard to press on when you do it the first time. If you need to, grab a pair of tweezers to help get it in place.
About the Embedded Linux Environment
The TS-7680 has the ability to boot to several different OSs and environments via U-Boot, a general purpose bootloader sitting on the small, 8 MB SPI flash chip onboard. You can find out more about the U-Boot environment by taking a look at the “U-Boot Environment” section of the TS-7680 manual. Currently, the supported OS image is Debian Linux, running the 3.14 kernel, which is preloaded onto the onboard eMMC flash and microSD card (sold as a separate option, included in development kit).
Pro Tip: For development, best practice is to boot to microSD card for ease of recovery should something go wrong. Just plug the microSD card into a development machine and modify files directly.
The onboard eMMC flash can be configured in two ways: 4 GB MLC for maximum capacity, and 2 GB pSLC (pseudo-SLC) for maximum data reliability. The images all weigh in at about 1.8 GB, so while you could use either option, you may be uncomfortable with space restrictions with 2 GB pSLC.
Pro Tip: We’ve taken a hint from the eMMC flash manufacturer and called it pseudo SLC, or pSLC because it ships as MLC and SLC-like operation can be performed by running a command, which blows a fuse on the chip, making it behave like SLC flash.
Otherwise, the flash and microSD card contain two partitions, a small one where U-Boot is located and the larger one where the filesystem and kernel are located. U-Boot understands how to load the kernel, device tree, and boot arguments and run the OS from the one partition. More information about U-Boot startup sequence can be found in the “U-Boot Environment” section of the TS-7680 manual.
Setup Networking
There are two distinct ways to connect to a network: wired and wireless. Both of these methods are very similar in how they are setup, so we’ll lump them together. Essentially what we’ll be doing is creating a network interface configuration file that Linux looks at when enabling an interface and then we’ll run the command to enable it. Full details are available in the“Configuring the Network” section of the TS-7680 manual. Let’s hit the highlights, shall we?
If you recall, we’re going to be working with the primary interface (eth0) that we’ve already connected. We will not be covering VLAN mode in this guide to keep things simple during the learning process. The steps you’ll see below also apply to the wireless interface.
First, let’s create our configuration file for all interfaces strategically placed into /etc/systemd/network/. We’ll call it eth.network and copy/paste the following into it:
[Match]
Name=eth* wlan0

[Network]
DHCP=yes
This will apply DHCP rules to all of the listed interfaces (see systemd.network man page). This is easiest for now. Of course, you could configure each interface with static IP address, but you’ll need a separate file for each as mentioned in the “Configuring the Network” section of the TS-7680 manual. Okay, the next step is to enable the interface using ifconfig like so:
ifconfig eth0 up
ifconfig wlan0 up
You may see a message similar to IPv6: ADDRCONF(NETDEV_UP): eth0: link is not ready . No worries, just plug in your Ethernet cable and you’ll see IPv6: ADDRCONF(NETDEV_CHANGE): eth0: link becomes ready . This is slightly different for the wlan0 interface, as that one you’ll need to associate with a wireless access point before the link will be ready. We’ll discuss this in further detail below. For now, let’s obtain an IP address by calling dhclient eth0:
root@ts7680:~# dhclient -v eth0
Internet Systems Consortium DHCP Client 4.3.1
Copyright 2004-2014 Internet Systems Consortium.
All rights reserved.
For info, please visit https://www.isc.org/software/dhcp/

Listening on LPF/eth0/00:d0:69:4c:40:9d
Sending on   LPF/eth0/00:d0:69:4c:40:9d
Sending on   Socket/fallback
DHCPREQUEST on eth0 to 255.255.255.255 port 67
DHCPACK from 192.168.1.1
RTNETLINK answers: File exists
bound to 192.168.1.120 -- renewal in 36176 seconds.
And, finally a quick test:
root@ts7680:~# ping embeddedTS.com
PING embeddedTS.com (23.239.20.143) 56(84) bytes of data.
64 bytes from embeddedTS.com (23.239.20.143): icmp_seq=1 ttl=55 time=41.2 ms
64 bytes from embeddedTS.com (23.239.20.143): icmp_seq=2 ttl=55 time=41.5 ms
64 bytes from embeddedTS.com (23.239.20.143): icmp_seq=3 ttl=55 time=41.5 ms
64 bytes from embeddedTS.com (23.239.20.143): icmp_seq=4 ttl=55 time=41.7 ms
^C
--- embeddedTS.com ping statistics ---
4 packets transmitted, 4 received, 0% packet loss, time 3004ms
rtt min/avg/max/mdev = 41.276/41.537/41.750/0.223 ms
Congrats! You’re well on your way. Next, let’s take a look at setting up wireless networking.
Wireless Networking
The wireless module included on the TS-7680 is the LSR TiWi-BLE transceiver module. If you’re curious about the nitty gritty, download the datasheet. Suffice it to say, this wireless module is not only capable of connecting to a wireless access point, but it can behave as an access point itself (aka master mode). We’ll concentrate on connecting to an access point in this guide. If you’d like to use it as an access point, you’ll want to review the “Host a WiFi Access Point” section of the TS-7680 manual.
Since we’ve already completed the step of creating the interface configuration file in the section before this, we’ll just jump right into enabling the interface, scanning for an access point, and then associating with it.
Enabling the wireless interface is a simple command:
ifconfig wlan0 up
Then, we’ll want to scan for access points using iwlist like so:
iwlist wlan0 scan
The output can be overwhelming, so you may want to filter out just the essid names using the command:
iwlist wlan0 scan | grep ESSID | cut -d':' -f2
Okay, so once you’ve identified an access point you want to connect to, you’ll need to associate with it. Now, there are open access points that don’t require any credentials to associate and there are protected ones using WEP or WPA security types.
Open Access Point
This is the easiest. You’ll be able to simply issue the following command to associate:
iwconfig wlan0 essid "default"
Now, make sure you’ve associated with the access point:
root@ts7680:~# iwconfig wlan0
wlan0 IEEE 802.11bgn ESSID:"default"
Mode:Managed Frequency:2.417 GHz Access Point: c0:ff:ee:c0:ff:ee
Bit Rate=1 Mb/s Tx-Power=20 dBm
Retry long limit:7 RTS thr:off Fragment thr:off
Encryption key:off
Power Management:off
Link Quality=70/70 Signal level=-34 dBm
Rx invalid nwid:0 Rx invalid crypt:0 Rx invalid frag:0
Tx excessive retries:0 Invalid misc:0 Missed beacon:0
Finally, run dhclient wlan0 to get an IP address.
WEP Protected Access Point
Very similar to ‘Open Access Point’ section above except you’ll need to specify a password:
iwconfig wlan0 essid "default" key "yourpassword"
Same as above, follow up with iwconfig wlan0 and dhclient wlan0 .
WPA Protected Access Point
For this, we’re going to use the wpa_passphrase and wpa_supplicant utilities which make life easier. First, create the /etc/wpa_supplicant/ directory and generate a passphrase configuration file. Replace ‘the_essid’ and ‘the_password’ with the essid and password to connect to the access point.
mkdir /etc/wpa_supplicant/
wpa_passphrase the_essid the_password >> /etc/wpa_supplicant/wpa_supplicant-wlan0.conf
You can take a look at this file, but essentially it contains information and a hashed password for the association. Next step is to start the wpa_supplicant daemon which will run in the background.
wpa_supplicant -iwlan0 -c/etc/wpa_supplicant/wpa_supplicant-wlan0.conf -B
You should see output similar to this:
root@ts7680:~# wpa_supplicant -iwlan0 -c/etc/wpa_supplicant.conf -B
Successfully initialized wpa_supplicant
root@ts-imx6:~# [ 306.924691] wlan0: authenticate with 28:cf:da:b0:f5:bb
[ 306.959415] wlan0: send auth to 28:cf:da:b0:f5:bb (try 1/3)
[ 306.968137] wlan0: authenticated
[ 306.978477] wlan0: associate with 28:cf:da:b0:f5:bb (try 1/3)
[ 306.988577] wlan0: RX AssocResp from 28:cf:da:b0:f5:bb (capab=0x1431 status=0 aid=9)
[ 307.009751] wlan0: associated
[ 307.012768] IPv6: ADDRCONF(NETDEV_CHANGE): wlan0: link becomes ready
[ 307.047989] wlcore: Association completed.
Then, same as the other sections above, follow up with iwconfig wlan0 and dhclient wlan0 .
Finally, if you want your connection to be there when you reboot, you’ll need to configure systemctl to automatically set everything for you.
systemctl enable wpa_supplicant@wlan0
systemctl start wpa_supplicant@wlan0
As always, feel free to review the“Configuring the Network” section of the TS-7680 manual for more information.
TS-SILO Example Script
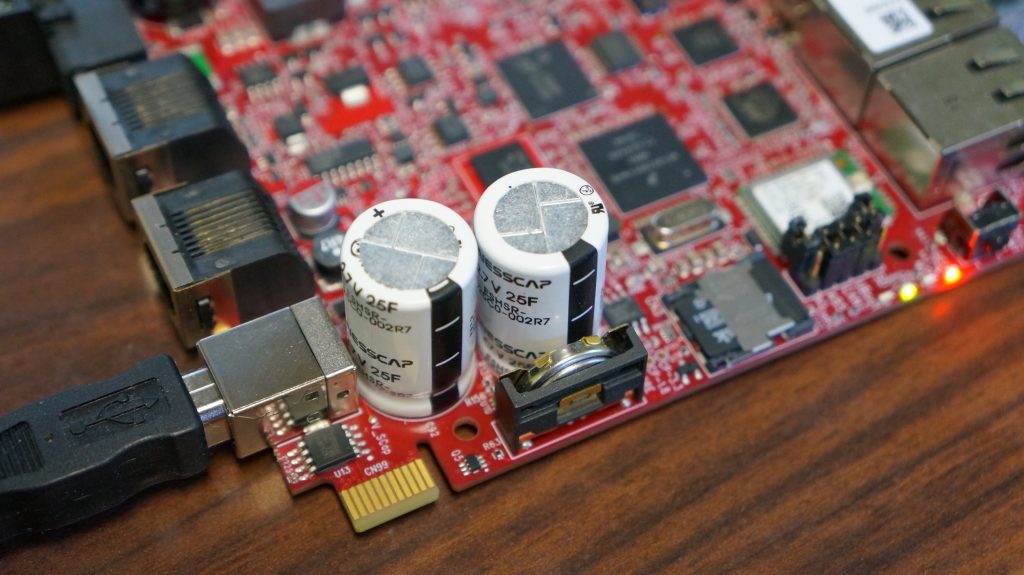
Quite possibly the neatest feature of the TS-7680 is the TS-SILO on-board backup power solution. TS-SILO provides 20 to 50 seconds of backup power, allowing a custom script to run in the case of a power failure.
A preloaded example script will issue the shutdown -r now command upon power failure to gracefully reboot the system to prevent filesystem corruption. Then, a microcontroller responsible for power management will hold the TS-7680 in a reset state until power is restored or until the TS-SILO completely drains, browning out the whole system. Once power is restored, the system will boot back up again.
Optionally, you can set a variable in the U-Boot environment to pause system startup until TS-SILO reaches a user defined charge percentage. For more information about TS-SILO, see the “SuperCaps” section of the TS-7680 manual. For now, let’s take a look at the script located at /usr/local/bin/tssupercapmon:
#!/bin/bash

echo 73 > /sys/class/gpio/export 2>/dev/null
power_failed=0
while true; do
    power=$(cat /sys/class/gpio/gpio73/value)
    if [ $power -ne 0 ] ; then
        if [ $power_failed -eq 0 ]; then
            # Code can be added below in order to turn off power-hungry
            # devices, or start other shutdown procedures required.
            # For example:
            # Turn off cell modem on DC:
            #   echo 233 > /sys/class/gpio/export 2>/dev/null
            #   echo low > /sys/class/gpio/gpio233/direction
            #
            # Disable relays
            #   echo 210 > /sys/class/gpio/export 2>/dev/null
            #   echo 211 > /sys/class/gpio/export 2>/dev/null
            #   echo low > /sys/class/gpio/gpio210/direction
            #   echo low > /sys/class/gpio/gpio211/direction
            #
            # The wall command can be removed if wanted.

            wall The script /usr/local/bin/tssupercapmon has detected main power has been lost!  Shutting down safely to prevent filesystem damage
            power_failed=1
            shutdown -r now
        fi
    else
      power_failed=0
    fi

    sleep 1
done
Of course, you can insert your own code here if you’d like. It runs in the background as “TS SuperCap Monitor Daemon” as part of systemd services startup. You can see this by looking at /etc/systemd/system/tssupercapmon.service:
root@ts7680:~# cat /etc/systemd/system/tssupercapmon.service
[Unit]
Description=TS SuperCap Monitor Daemon

[Service]
Type=simple
ExecStart=/bin/bash /usr/local/bin/tssupercapmon

[Install]
WantedBy=multi-user.target
Conclusion
In this getting started guide, we took a quick look at how to get everything connected, how to communicate with the board, and how to setup networking. You should be well on your way in developing your application.
Is there anything else you’d like to see added to this practical getting started guide for the TS-7680? Be sure to comment below, and we’ll get it added!
Thanks for posting nice articles on TS boards and projects. Your articles are very clear and give me a good start in working with TS hardware.