
Things to Know
We’re going to be walking through how to prepare a Yocto build for use with our i.MX6 products, specifically the TS-4900 which we have a special build recipe for. A build recipe is a friendly term to describe the scripts and environment variables required to build a Yocto distribution. There are many other build recipes available which work on a more generic level as well, so this guide can be applied generally as well. This guide is both an echo and extension of the TS-4900 Build Yocto Distribution wiki page. I’ll be mostly echoing (aka copy/pasting) the steps, but I’ll also add a few notes along the way. I’m going to assume you’ve landed here because you’re using search terms that make you at least familiar with what Yocto is and the terminology that surrounds a basic software development environment. If you have questions, I’m happy to try and answer them in the comments that follow.
For the Record
Just so we’re in the same frame of mind here:
- Yocto Distribution
- Yocto is actually not a “distribution” in the traditional sense. You’re building a custom Linux-based system for embedded products. For more information, take a look at the Yocto Project website.
- Image
- A tarball containing the kernel, firmware, TS-4900 FPGA bitstream, user space utilities, etc. which can be extracted to a media disk and booted from.
- Build
- Another way of saying “compile” in Yocto-speak.
- Bitbake
- The program which will ultimately be used to build the install-ready Yocto image.
- Recipe
- A set of instructions for bitbake to follow in order to compile all the packages into a single Yocto distribution. Notice the clever word usage, as if you’re baking some of your grandma’s famous cookies or soufflé.
Recommended Reading
As mentioned in the wiki page, here is some recommended reading material in case you’re interested in learning about Yocto in more depth.
Pro Tip: You really should read these.
What You’ll Need
You’ll need to have access to a 64-bit* Linux development machine or build server, preferably a powerful one. Our build server takes between 4 and 6 hours to complete this build. Our build server is a virtual machine on a host with Intel Xeon E5-2609 v2 CPU at 2.50GHz and 16 GB RAM. Your mileage may vary.
Pro Tip: *A 64-bit machine is a requirement: Chromium will require a significant amount of RAM to link (16 GB+), which is expected to fail on 32-bit machines. You could remove this package from the build recipe if it’s not required for your application and build on a 32-bit machine. Try the meta-web-kiosk layer with packagegroup-kiosk-manager or even embeddedts/fullscreen-webkit for a lighter weight solution.
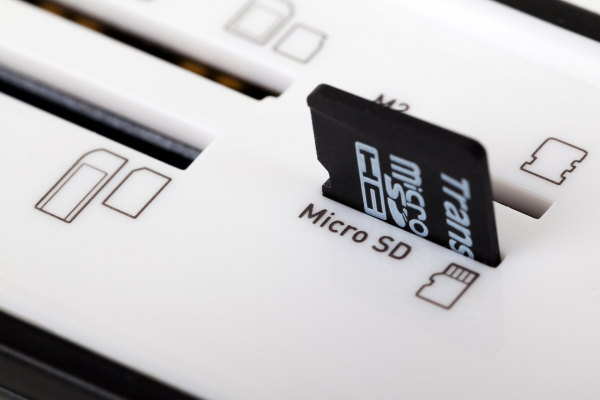
You’ll also need a way of transferring the image to your boot media. In our case, it’s a microSD card, so we’ll need to have a SD card reader with microSD adapter. You’ll then need to be familiar with using a partitioning tool such as GParted (GUI) or fdisk and mkfs (CLI) in order to prepare the disk and get the image extracted to it.
Diving In
Step 1: Install Required Packages
We’ll need to be sure all the required packages, like the gcc compiler, git, and more, are installed on your development machine. Here’s a nice one-liner that will install everything we need on a Debian based system, like Debian Jessie or Ubuntu Wily. The required packages and package names may vary on your system depending on version and distribution.
sudo apt-get install gawk wget git-core diffstat unzip texinfo gcc-multilib build-essential chrpath socat libsdl1.2-dev xterm
Now, we need to install the program repo, which is a tool for downloading and updating a set of git repositories. We’ll use this in the next step to actually download the Yocto BSP from Technologic Systems.
mkdir ~/bin
curl http://commondatastorage.googleapis.com/git-repo-downloads/repo > ~/bin/repo
chmod a+x ~/bin/repo
export PATH=${PATH}:~/bin
Pro Tip: You may want to modify ~/.bashrc or ~/.bash_profile with PATH=${PATH}:~/bin so that you don’t need to worry about adding ~/bin to your PATH variable every time you login.
Step 2: Downloading Yocto Board Support Package via Git Repository
We’re now ready to download our Yocto sources to compile/build. Essentially, what we’re doing is cloning the embeddedts/ts-oe-bsp repository and then repo will look at default.xml for other repositories to fetch, which includes pulling packages from about 10 other repositories including yoctoproject, Freescale, and openembedded.org, which is why this guide can be both specific for the TS-4900 and generic for other systems using the included standard image recipes as well.
First, make a project directory. We’ll just create it in our home directory.
mkdir ~/ts-bsp
cd ~/ts-bsp
Next, we’ll be checking out the Fido branch of the embeddedts/ts-oe-bsp repository, which happens to be the one that has gone through the most testing and is most reliable. If you enjoy being on the cutting edge, then the Krogoth branch is for you. There’s quite a bit to download here, so go reward yourself with a snack or something while you wait.
repo init -u https://github.com/embeddedts/ts-oe-bsp.git -b fido
repo sync
Every once and awhile, updates will be made to the ts-oe-bsp. Use the repo sync command to pull those updates down and proceed with the rest of the steps below.
Step 3: Environment Setup
For this step, we need to set some environment variables and update some auto-generated config files with specific directives. If you’re here for the generic route, you may or may not need to update these files any further.
We need to tell bitbake what the machine target is. In our case, it’s ‘tsimx6’. Other machines can be found by running bitbake -u hob (GUI) or ./setup_environment and read the usage (CLI).
export MACHINE="tsimx6"
Now, we run the next command to source (aka set) variables generated by the setup_environment script, pointing it to the directory called build. The first time you run this, you’ll be greeted with a EULA that you’ll need to scroll through and then accept to continue.
source ./setup-environment build
Great! Now, we need to update the newly generated contents of build/conf/bblayers.conf and build/conf/local.conf. You may have noticed we’ve already been dropped into the build directory automatically after running the last command.
conf/bblayers.conf
LCONF_VERSION = "6"

BBPATH = "${TOPDIR}"
BSPDIR := "${@os.path.abspath(os.path.dirname(d.getVar('FILE', True)) + '/../..')}"

BBFILES ?= ""
BBLAYERS = " \
${BSPDIR}/sources/poky/meta \
${BSPDIR}/sources/poky/meta-yocto \
${BSPDIR}/sources/poky/meta-yocto-bsp \
\
${BSPDIR}/sources/meta-openembedded/meta-oe \
${BSPDIR}/sources/meta-openembedded/meta-systemd \
${BSPDIR}/sources/meta-openembedded/meta-multimedia \
${BSPDIR}/sources/meta-openembedded/meta-networking \
${BSPDIR}/sources/meta-openembedded/meta-ruby \
${BSPDIR}/sources/meta-openembedded/meta-python \
${BSPDIR}/sources/meta-openembedded/meta-gnome \
\
${BSPDIR}/sources/meta-fsl-arm \
${BSPDIR}/sources/meta-fsl-arm-extra \
${BSPDIR}/sources/meta-fsl-demos \
${BSPDIR}/sources/meta-ts \
${BSPDIR}/sources/meta-qt5 \
${BSPDIR}/sources/meta-browser \
"
conf/local.conf
Append the following to the bottom of this file.
LICENSE_FLAGS_WHITELIST = "commercial_libav commercial"
PACKAGECONFIG_append_pn-qtbase = " icu accessibility"

# Skip these three if you do not want systemd
DISTRO_FEATURES_append = " systemd"
DISTRO_FEATURES_remove = " wayland"
VIRTUAL-RUNTIME_init_manager = "systemd"
DISTRO_FEATURES_BACKFILL_CONSIDERED = "sysvinit"
Awesome! With our environment all setup properly, we’re ready for the next step of actually building our image.
Step 4: Building Our Yocto Distribution
Last step! It hasn’t been that difficult so far, right? The engineers at Yocto Project, NXP/Freescale, and Technologic Systems have made it pretty easy, so kudos to them. We’re now ready to actually build our custom Yocto distribution, keyword being ‘custom’. Typically, if you’re here reading through this guide, you’re wanting to make a change to the Yocto distribution that comes preloaded with our i.MX6 products. This is the time to modify any of the recipes to suit your specific needs.
For example, maybe you’d like to add git, nodejs, and nodejs-npm packages (to be included in the next official release, by the way) to your build so you can use them on your embedded system. For this example, we’ll want to modify ../sources/meta-ts/recipes-extras/images/ts-x11-image.bb to add these package names to the IMAGE_INSTALL variable list.
IMAGE_INSTALL += "packagegroup-machine-base packagegroup-core-boot packagegroup-core-full-cmdline packagegroup-core-x11 packagegroup-core-eclipse-debug packagegroup-core-tools-debug packagegroup-qt5-toolchain-target linux-firmware matchbox-wm matchbox-desktop matchbox-terminal matchbox-keyboard bash-completion fbset imagemagick picocom iperf iotop libmodbus fbgrab gtkperf eglinfo-x11 hostapd libsocketcan canutils qtwebkit cinematicexperience fontconfig freetype xinput-calibrator wvdial ppp boost libusb1 python-modules python-core python-ctypes python-dev python-mmap python-shell python-threading util-linux-mkfs e2fsprogs tcpdump sqlite3 usbutils iw wpa-supplicant nfs-utils alsa-utils-alsamixer wireless-tools i2c-tools qtdeclarative-qmlplugins qtquickcontrols-qmlplugins qtquick1 nano hexedit espeak devmem2 usb-modeswitch lsof curl chromium packagegroup-fsl-gstreamer packagegroup-fsl-gstreamer-full packagegroup-fslc-gstreamer1.0-full packagegroup-fslc-gstreamer1.0 packagegroup-core-buildessential ldd xcursor-transparent-theme qtmultimedia rsync lighttpd-module-cgi git nodejs nodejs-npm"
Pro Tip: If you want to know which packages are available, you can use bitbake -u hob if you’re on a GUI machine. Otherwise, you’ll need to browse/grep/find around the …/sources/ directory, though this is not as intuitive as the hob interface.
Once you’ve decided you’re ready to build, it’s a very simple call to the bitbake command followed by the name of our image recipe. There are many images available which might be best tailored to your needs if you’re going the generic route. You can use bitbake-layers show-recipes “-image“ to get a list of all images. The popular starting points are core-image-x11 or core-image-base, and you can add IMAGE_INSTALL to build/conf/local.conf to select more packages. We’re going to choose the common Technologic Systems’ image with X11/QT support called ts-x11-image. When finished, we’ll have a tarball with boot-ready binaries including the kernel image, firmware, FPGA bitstreams, user-space utilities, and more.
bitbake ts-x11-image
Pro Tip: Stopping the process requires only a single Ctrl+c break. Bitbake will receive the interrupt, process the rest of the build tasks, and gracefully exit. Otherwise, you’ll cause obscure build issues and have to start over.
Bitbake is very intelligent and will automatically optimize the build by figuring parallel processes and build projects concurrently. Still, this will take a little while as it steps through the packages to compile and prepare, so go have a foam sword fight on rolling chair(iot)s with a coworker or friend.

Once finished, you’ll have a tarball available at tmp/deploy/images/tsimx6.
Pro Tip: If you find yourself facing a compile error for unknown reasons, you can attempt to do the equivalent of make clean by running bitbake -c clean ts-x11-image . If that doesn’t work, the best way to start clean again is to simply start over again by moving the build/tmp directory to build/tmp2. Then, you can make incremental changes to find out where you went wrong.
Step 5: Transferring the Image and Booting
Hopefully you won the sword fight with minimal damage to yourself and others. The next step is simply formatting our media and extracting the tarball to it. We’ll be using a microSD card to boot from, so that’s what we’ll talk about here.
Insert the microSD card into your machine and then run fdisk -l to find the /dev/ mount point. Let’s assume it’s /dev/sdc in this case.
First, use GParted to format the disk into a single partition. This GUI solution is the easiest and most familiar method for most people. If you’re looking for a CLI solution, take a look at fdisk and mkfs to do the same thing.
Now that we have a microSD card with a single ext4 partition, we’ll mount it again and extract our generated Yocto tarball, located at tmp/deploy/images/tsimx6.
mkdir /mnt/sd
sudo mount /dev/sdc1 /mnt/sd
sudo tar -xf ts-x11-image-tsimx6.tar.bz2 -C /mnt/sd
sudo umount /mnt/sd/
sync
A final congratulations to you for learning how to build a custom Yocto distribution! You should now be able to take the microSD card, insert it into the board, and boot. Have fun with it. In the meantime, should you have any questions or comments or concerns about this article, please be sure to comment below.
Addendum
Here are a few extra tips gathered from our engineers on building a custom Yocto distribution.
- Build a matching toolchain using bitbake
- For example, run bitbake meta-toolchain-qt5 if you’re using QT, or bitbake meta-toolchain to produce a cross compiler matching your image selection.
- Useful bitbake commands on NXP community pages
- Adding more layers is a pretty easy thing to do.
- List of common layers
- Example steps:
- cd source/
- git clone git://git.yoctoproject.org/meta-mono
- git checkout master # use branch that matches yocto release if available
- Then, in your conf/bblayers.conf file, add, for example the mono package:
- ${BSPDIR}/sources/meta-mono
Thanks, very helpful. The reason I built a custom image myself was to add CUPS. Wish I had remembered seeing this blog a few months ago – I could have known to remove chromium sooner. My machine only has 8GB RAM. After what may have been several hours of just chromium build, the memory suddenly gets gobbled up and eats into swap, causing the system to be essentially locked up to user interaction. I left it overnight and it had bailed with errors eventually. I also had run into a picocom error which requires a patch. Once I removed chromium and picocom from the ts-x11-image.bb file, the bitbake completed.
That’s great to hear it was helpful. Thanks for taking the time to comment.