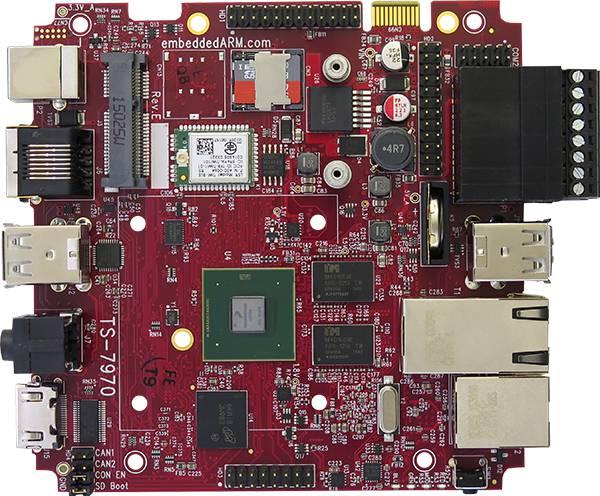
 As you may have seen in my TS-7970 Home Security Systems video on YouTube, I took a TS-7970 quad core single board computer and built it into my very own home security system using the open source software Zoneminder. This product works very well for the two camera system that I have hooked up. In case you didn’t get a chance to see the video, I wanted a security system that was cost effective and still worked well with the capability to expand if I so desired. I was referred to Zoneminder by a good friend and coworker of mine. Since I work at Technologic Systems I thought it would be cool to be able to use one of our boards to build up this camera system. After getting approval to use one of our boards my journey began on making my very own security system a reality. Home
To start out I am NOT a software developer. However, with the available user guides, and the occasional help from my co-worker friend, I got the system working. When starting out I originally used a TS-7970 solo SBC to begin my project using a board from work that I prepared as if shipping to a customer including an 8GB micro SD card. Once I got home I got to work on the project. I have to say Zoneminder has some great install guides. They take you 80% of the way when using this SBC, the other 20% was trial and error and a little help from my friend that knows Debian much better than I. Once I got set up on my computer I connected to the board using the USB B port and TeraTerm on my computer. I booted the TS-7970 up to its main prompt and began following the Install guide on Zoneminder’s wiki for debian systems:
https://wiki.zoneminder.com/Debian_8_64-bit_with_Zoneminder_1.29.0_the_Easy_Way
First thing I had to do in the system was to create a password for the root user. Once I did that I did apt-get update to make sure I was up to date. I then installed PHP, MySQL, and Zoneminder which also included installing apache web server onto the TS-7970. To install some of those packages I had to make sure to add the Jessie backports to my sources.list file (as mentioned in the guide). It took some time to do everything in the right order and to get it to work perfect. I believe I honestly had to do this three times to get the system working how I wanted it to. Again, I remind you I am NOT a software developer so I may have done stuff on accident that a normal more software savvy individual would not have. Once Zoneminder was installed I had to create a MySQL database that Zoneminder could use. Then I had to add Zoneminder to start automatically when the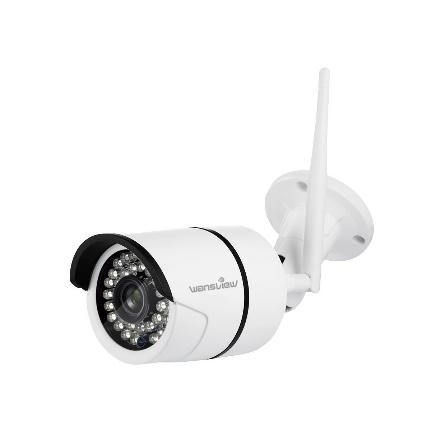 board boots. To get the apache web server to work properly I had to create a new user to the sudo group. Many fine tuning settings later my board was running Zoneminder and I could hook up my cameras that I purchased. Home
I was able to log into the Zoneminder web GUI and setup my cameras. This is specific to your cameras that you would use. The Zoneminder web service does well and has many options to tweak, many more than what I need in fact. Once I got the system up and running I was now able to tweak the cameras to detect motion and set the resolution. Mind you this is still on the TS-7970 solo board. I noticed that the FPS on the captured frames was around 8 frames per second, which I guess is normal for surveillance systems, but I wanted more, so I swapped out the TS-7970 solo for a quad core. By doing that I had to start all over and reinstall the security system. This time I also did some port changes for the apache server to go through the router, as well as API permissions so that only authorized users can access my system from the outside world.
After getting the TS-7970 quad core board up and going I was getting 20+ FPS on my captured video, much better! I was very happy with how this project came out, I now have a security system that is running on a single board computer that could honestly be installed almost anywhere since it is wifi capable, and is capable of running in environments that other boards are not. I could see this setup being used as a standalone server in multiple locations for a business with all of them sending the captures off to a single server over the internet. All of this is made possible by the TS-7970‘s powerful hardware, it is definitely a great little system for this project.
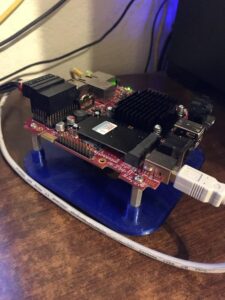
After several months of use, the system is still working flawlessly, I have now downloaded ZM Ninja from the iOS store so I could have a nice app to check on my security system with. I also have a sweet base made by one of my coworkers at our office using our 3D printer (which also uses one of our boards as a print server), I have been very happy with this product but I still wanted to tinker because our little TS-7970 quad core board had more features available to use. One thing that would have been nice is more storage to keep events longer. My friend had an amazing idea of using the mSATA on the TS-7970, so I went on a search for a mSATA drive to use on my little security project. Two days later I received my mSATA drive and once I got home I turned off the board, installed the mSATA, and powered on the board. Immediately linux recognized the 32GB mSATA device. Using this guide: https://wiki.zoneminder.com/Using_a_dedicated_Hard_Drive I followed it step by step only to run into a few technicalities of binding and mounting folders, as well as getting the drive to mount automatically. After only about an hour worth of tinkering, my system was back up and running using this fancy new fast mSATA device with tons more storage. After adding the 32GB mSATA to the TS-7970 I noticed immediately an improved playback on the video when reviewing the stored footage. I was impressed to say the least. Home